
Main Quest · Der Eisendrache
My Brother's Keeper
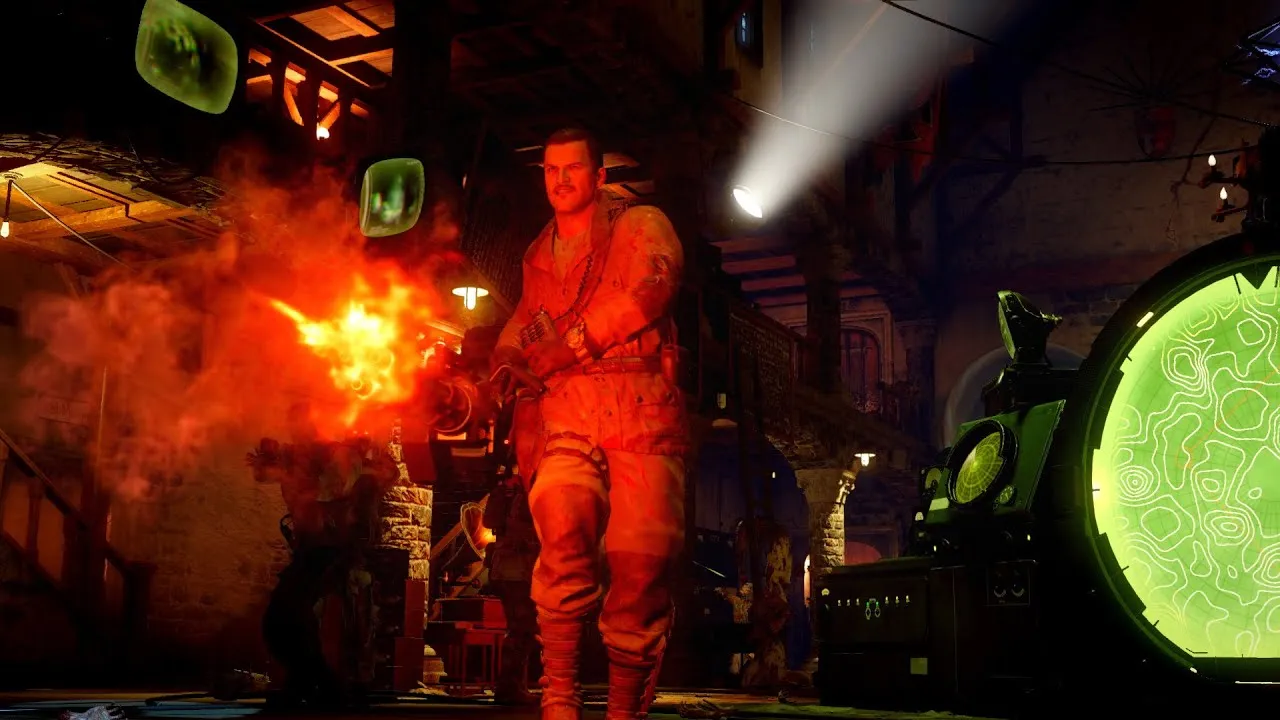
The main Easter egg on Der Eisendrache. Built around the elemental bows, a pair of trips into the past and a five-phase boss fight, it is the main quest most players complete first — solo needs only one upgraded bow.
Spoiler warning
This walkthrough reveals the map's finale. Continue only if you want to know how it ends.Preparation
Before you start
Recommended loadout
- • One upgraded elemental bow per player (all four in a private match)
- • The Ragnarok DG-4, built
- • Jugger-Nog and Mule Kick
- • A Pack-a-Punched shotgun for Panzersoldats
- • Danger Closest GobbleGum for the boss fight
Prerequisites
- • One upgraded bow per player — in a private or custom match, all four regardless of player count
- • The Ragnarok DG-4 built (required to enter and to damage the boss)
- • The Death Ray activated at least once
Overview
What you are getting into
Der Eisendrache is the quest most players finish first, and with good reason — solo you only need one upgraded bow, and most of the difficulty is in knowing what not to shoot. The steps below are in the order the game expects them. Two of them punish hesitation, so read those before you start rather than during.
Walkthrough
Step by step
- 01
Charge the teleporter beacons
With the plain Wrath of the Ancients, shoot each electrified rod on top of the Undercroft teleporter.
This step wants the base bow specifically, so return your upgraded bow to its box and collect the plain Wrath of the Ancients from the Family Crypt first. Shoot each rod until its tip glows faintly orange.
Tip: Swap back to your upgraded bow immediately afterwards — the next step is timed and needs it.
Troubleshooting: Success is the orange glow fading followed by a Margwa growl. If nothing happens, you are probably still holding an upgraded bow.
- 02
Shoot four wisps
Four of eight objects around the map will spark one at a time. Shoot each with an upgraded bow.
Eight objects can spark: the phone by Quick Revive, the truck tire near Double Tap, the box by the workbench above Double Tap, the globe beside Samantha’s Room, the phone on the pillar near the power switch, the clock in the Barracks, the radio beside Speed Cola, and the clock above the Church fireplace. Only one sparks at a time, the set is randomised per game, and the same object never repeats within a sequence.
Warning: This is the step that fails people. Learn the route first.
Troubleshooting: A failure cue plays and the step resets to the start of the next round — nothing else is lost. Walk the eight locations once before you begin so you are not searching under time pressure.
- 03
Travel to the past
Enter the teleporter, take the Soul Canister and fuses, memorise the safe symbols, then set the Death Ray to Protect and enter the code.
In the past lab your weapons are disabled. Hold use on the large blue Soul Canister in the left corner near Groph, hold use on the small fuses on the wooden box right of the teleporter, and memorise the three symbols on the safe top to bottom. Back in the present, insert a fuse on the Death Ray side facing the Clock Tower, pull the lever on the other side to switch it from Destroy to Protect, then enter the three symbols in order at the terminal near the Clock Tower. That opens the safe in the past, which holds two large fuses and a key card.
Tip: The fuses and key card have no pickup prompt and never appear in your inventory. Hold use and move on.
Warning: Everything here must happen inside one round. In co-op all players must enter the teleporter together. A Panzersoldat spawns the instant you return, whatever the round — be somewhere you can fight before you teleport back.
Troubleshooting: The safe symbols reroll every round, so re-memorise them on every trip. A wrong code means redoing both this step and the wisps.
- 04
The memory terminals
Fit the large fuses to the Tesla coils, set the Death Ray back to Destroy, then complete the symbol-matching game at both five-monitor terminals.
The coils you want are the two flanking the Death Ray with only two vertical currents running up them. Then interact with either terminal — outside the Clock Tower or on the Rocket Platform. Four symbols flash and vanish; the top screen shows them one at a time and you interact with the matching screen. Do the other terminal afterwards: same symbols, rearranged.
Troubleshooting: Failure is cheap — interact again and retry as many times as you like within the round. The one catch is that failing the second terminal makes you redo the first as well.
- 05
Sabotage the rocket
Press the green button on the back of the Death Ray, then collect the Vril Generator from the crash site.
Both orbs on the Tesla coils are now lit. Pressing the button brings a rocket down through the Clock Tower bell and into the Upper Courtyard, and Groph seals the frozen Ultimis Dempsey behind a lightning barrier that will damage you if you touch it.
Warning: The Vril Generator is beside the debris, not the cryopod. There is no pickup prompt and nothing appears in your inventory. If you miss it, you will not find out until the Keeper step silently refuses to start.
- 06
The Keeper and the MPD
Travel to the past again for the key card and stone tablet, place the Vril Generator in the Family Crypt, then charge the tablet at four Keeper circles.
Repeat the wisp step to travel back. Insert the key card at the computer left of the Kronorium; a case near the blocked Undercroft doorway opens with the Keeper stone tablet. Back in the present, place the Vril Generator in the slot on the slab below the resting knight in the Family Crypt. The Keeper then visits four locations in random order — the Church courtyard by the Mystery Box, beside Mule Kick, by the knight armours down the hall from power, and beside Double Tap. Stand in each white circle and get kills with the bow the screen tint asks for: blue Storm, teal Wolf Howl, orange Rune Prison, purple Demon Gate.
Tip: Solo in a public match all four circles accept your single upgraded bow. Zombies do not need to be in the circle — only you. At the Double Tap location the Keeper is slouched and ignores you until you place the stone tablet in the empty slot to its left.
Troubleshooting: Hellhound kills and bow melee kills do not count. Endless Hellhounds spawn for the whole step and award no points.
- 07
The Corrupted Keeper
Place the Soul Canister in the MPD’s empty corner, then every player plants a Ragnarok on an anti-gravity tile to enter the fight.
Five phases. Phases 1, 3 and 5 are the Keeper itself; phases 2 and 4 replace it with Panzersoldats and skeletons, and the first Panzer killed drops a Max Ammo. Your damage window comes just before each arena-wide shockwave, when a ball of electricity appears beneath the Keeper: run in, plant the Ragnarok as a trap, then take cover. That pins the Keeper and exposes a glowing rend on its chest.
Tip: Danger Closest negates the skull stuns, the Panzer shock-mine stun and your own splash damage — which makes the Ray Gun and a Pack-a-Punched MR6 excellent here rather than dangerous.
Warning: The arena-wide shockwave is an instant down regardless of perks. The glowing blue pillars are the only cover. In co-op, phase 5 also spawns a Panzersoldat each time the Keeper winds up.
- 08
The Summoning Key
Collect the Summoning Key from the MPD, then take it to the terminal outside the Clock Tower.
Back at the MPD, hold use on the glowing blue circle shaped like the Vril Generator, wait a few seconds, and pick up the Summoning Key. Carry it to the same terminal you used for the memory game and interact. The key rises and discharges, every zombie despawns, and the ending plays.
Following along in-game? Switch to Guided Mode for one step at a time on a screen you can read at arm's length.
In detail
Der Eisendrache Easter Egg Guide
What you need before you start
Three things must be done before the quest will accept a single input. None of them are part of the quest itself, but skipping one costs you a round or worse.
- One upgraded elemental bow per player. Solo in a public match that means a single bow — any of the four. In a private or custom match all four bows are required no matter how many players are in the game, which catches a lot of people out.
- The Ragnarok DG-4, built. You cannot enter the boss arena without it, and it is the only thing that damages the boss.
- The Death Ray activated at least once. The time-travel step cannot proceed otherwise, and it also gates one of the Ragnarok parts.
Setup: power, Pack-a-Punch, Ragnarok
Power is in the Armory, on the wall beside the generators. From the tram station at spawn you are buying your way up through the courtyard, across the bridge and through the bedroom to reach it. Jugger-Nog sits just past the gate in the underground tunnel and needs power on.
Pack-a-Punch is not in one place. Three teleporter pads each hold a piece of the machine — one on the Bastion near the Death Ray, one in the Undercroft, and one on the Rocket Platform, which you reach through the Undercroft teleporter for 500 points. Interact at each pad to send its piece away. Order does not matter; the machine assembles at whichever pad you activate last, and afterwards it rotates between the three locations between rounds.
The Ragnarok DG-4 takes three parts and is built at the workbench beside the pyramid in the Undercroft. The first part drops from the first Panzersoldat, which arrives on round 12. The second floats above the Bastion once the Death Ray has been used, and has to be grabbed mid-flight from a Wundersphere — press interact while you are still in the air. The third is the awkward one: during a rocket test, pull the lever at the bottom of the left staircase behind the rocket, sprint into the tunnel before the test kills you, then wait until all three lights on the console are solid green and interact. Solo, you will usually need a second test to get both halves done.
Step 1 — Charge the teleporter beacons
Put your upgraded bow back in its box and collect the plain Wrath of the Ancients from the Family Crypt — this step wants the base bow specifically. In the Undercroft teleporter room, shoot each of the electrified rods on top of the teleporter until the tip glows faintly orange.
Confirmation: the orange glow fades and a Margwa growl plays. Then swap back to your upgraded bow, because the next step is timed and wants the upgraded one.
Step 2 — The wisps
This is the step that fails people. Eight objects around the map can spark. Only one sparks at a time, and you must shoot four in sequence with an upgraded bow. Which objects are used is randomised per game, and the same object never repeats within a sequence.
| Object | Where |
|---|---|
| Phone | Small office with Quick Revive |
| Truck tire | Near Double Tap |
| Box | By the workbench above Double Tap, on the way to the Wundersphere |
| Globe | Small room beside Samantha’s Room |
| Phone | Pillar near the power switch — same pillar as the Bowie Knife, opposite side |
| Clock | Barracks, the hallway between the Clock Tower and the Church |
| Radio | Church corner beside Speed Cola, the one nearer the entrance |
| Clock | Above the fireplace in the Church |
Each successful shot stops the object sparking and is followed a second or two later by a Margwa growl. After the fourth, a distinct cue plays. Once you have attempted this step, it re-arms at the start of every round, so a failed run only costs you the round.
Step 3 — Travelling to the past
The bottom light on the teleporter turns purple. In co-op every player has to step in together. You arrive in the past laboratory with your weapons disabled while Groph talks to Richtofen. There are three things to do here:
- Hold use on the large glowing blue canister in the left corner near Groph. This is the Soul Canister and you need it much later, at the MPD.
- Hold use on the small fuses on the wooden box in the corner to the right of the teleporter.
- Memorise the three symbols on the safe, top to bottom, shown as Groph locks it. There are four possible symbols: a lightning bolt, a rectangle with a half-circle, a circle with dots, and a diamond shape with an upward arrow. They reroll every round, so memorise them again on every trip.
Back in the present, go to the Death Ray. On the side facing the Clock Tower, insert a fuse — you will see the current start running. Then go round to the other side and pull the lever to switch it from Destroy to Protect. Now go to the terminal near the Clock Tower and enter the three safe symbols in the order you saw them, top to bottom.
That opens the safe in the past laboratory, across from the teleporter. Interacting with it gives you two large fuses and a key card from the top shelf. There is no pickup prompt and nothing appears in your inventory, so it is easy to believe you failed when you did not.
Step 4 — The memory terminals
Insert each large fuse into the two Tesla coils flanking the Death Ray — the ones with only two vertical currents running up them — then set the Death Ray back to Destroy. You do not need to fire it again.
There are two five-monitor terminals: one outside the Clock Tower and one on the Rocket Platform. Interact with either. Four symbols flash across the bottom screens and disappear; the top screen then shows them one at a time and you interact with the screen matching each. When the machine shuts down with a success cue, go and do the other terminal — same symbols, rearranged.
Failure here is cheap: you can immediately interact again and retry as many times as you like within the round. The one catch is that failing the second terminal makes you redo the first as well.
Step 5 — Sabotage the rocket
Both orbs on top of the Tesla coils are now lit. Press the green button on the back of the Death Ray. A rocket falls, destroys the Clock Tower bell and crashes into the Upper Courtyard, and Groph seals the frozen Ultimis Dempsey behind a lightning barrier that will hurt you if you touch it.
Step 6 — The Keeper and the MPD
Travel to the past a second time, which means doing the wisp step again exactly as before. Every round after your first trip opens with a Margwa growl, so a wisp is always available. In the past, hold use on the computer to the left of the Kronorium on the right-hand side of the room to insert the key card. A case near the blocked Undercroft doorway opens with a stone tablet bearing the Keeper symbol — take it and wait to return.
In the Family Crypt, place the Vril Generator in the slot on the slab below the resting knight. A ghostly Keeper appears and Hellhounds begin spawning endlessly for the rest of the step, awarding no points.
The Keeper visits four locations in a random order: the Church courtyard beside the Mystery Box spawn, beside Mule Kick, by the knight armours down the hall from the power switch, and beside Double Tap. At each one, stand in the white circle and get kills to charge the tablet. The screen edge tells you which bow it wants — blue for Storm, teal for Wolf Howl, orange for Rune Prison, purple for Demon Gate.
- Solo in a public match, all four circles accept the one bow you upgraded.
- Zombies do not need to be inside the circle — only you do. More players standing in it widens the radius.
- Hellhound kills do not count, and neither do bow melee kills.
- You can step out and come back; progress is not lost.
- At the Double Tap location the Keeper is slouched and will ignore you until you hold action on the empty square slot to its left and place the stone tablet there.
After the fourth circle the Keeper becomes solid, walks to the Undercroft, is struck by lasers where the pyramid stood, and teleports in the Moon Pyramid Device. Three of its four corners hold canisters. Place the Soul Canister you took from the past in the empty fourth corner to open it, revealing the Corrupted Keeper.
Preparing for the boss fight
The fight is long and the failure states are abrupt, so it is worth spending points before you trigger it.
- Danger Closest is the single most useful GobbleGum here. It negates the skull stuns, the Panzer shock-mine stun, and your own splash damage — which in turn makes the Ray Gun and a Pack-a-Punched MR6 excellent instead of dangerous.
- A Pack-a-Punched shotgun clears Panzersoldats quickly. Bring one.
- Mule Kick lets you carry a bow, an anti-Panzer weapon and a boss-damage weapon at once. In co-op you can split those roles instead.
- No bow does meaningful damage to the Keeper. They are there to charge the Ragnarok and to get you out of being surrounded. Storm and Rune Prison handle Panzer crowds; Wolf Howl and Demon Gate do not.
- Monkey Bombs help. Max Ammos do spawn at fixed points in the fight, but bring reserves anyway.
To start the fight, every player places their Ragnarok DG-4 in trap mode on one of the blue anti-gravity tiles. You are then teleported into the arena.
Step 7 — The Corrupted Keeper
A dark circular room with glowing blue pillars. Your Ragnarok drains to empty and then instantly refills as the fight starts; after that you recharge it with kills as normal. The Keeper has four attacks, one per bow element.
| Attack | What to do |
|---|---|
| Rain of homing skulls | They stun on hit. You can shoot them out of the air. |
| Summoned skeletons | Hard to see at low brightness — their eyes glow faintly. |
| Glowing mounds | Enough damage to down a player without Jugger-Nog. They dispel after a few seconds; move. |
| Arena-wide electric shockwave | An instant down for anyone it touches, whatever your perks. The blue pillars are the only cover. |
The fight runs five phases. Phases 1, 3 and 5 are the Keeper as described, with Hellhounds added in phase 3 to keep your Ragnarok charged. Phases 2 and 4 remove the Keeper and send in Panzersoldats and skeletons instead; the first Panzer you kill drops a Max Ammo. A Max Ammo in the centre of the arena marks each transition. In co-op, phase 5 also spawns a Panzersoldat every time the Keeper winds up its shockwave. A final scream and a spin means it is dead.
Step 8 — The Summoning Key
You are returned to the MPD. On one side is a glowing blue circle shaped like the Vril Generator — hold use, wait a few seconds, and pick up the Summoning Key. Carry it to the terminal outside the Clock Tower, the same one you used for the memory game, and interact. The key rises and discharges, every zombie despawns, and the ending plays: the castle rockets launch at the Moon and destroy Griffin Station, killing Groph.
The reward is all nine perks on the map, a moment of damage immunity, 2500 XP and the Frozen Freedom title. Your perk slot cap is not raised, and going down still loses them.
When something goes wrong
| Symptom | What happened | Fix |
|---|---|---|
| Failure cue during the wisps | You shot a non-sparking object, used the base bow, or ran out of time | The step re-arms at the start of the next round. Nothing else is lost. |
| Safe will not open | Wrong symbol order, or the symbols rerolled on a later round | Redo Step 2 and Step 3 together. Re-memorise the symbols on the new trip. |
| Keeper never appears in the Family Crypt | You did not pick up the Vril Generator after the rocket crash | It is still in the snow by the debris. There is no prompt — walk over it and hold use. |
| Second memory terminal failed | Both terminals reset together | Redo the first terminal, then the second. Unlimited retries in the round. |
| Circle will not take souls at Double Tap | The Keeper there is slouched and wants the tablet first | Hold action on the empty square slot to its left to place the stone tablet. |
| Downed instantly in the boss arena | The shockwave ignores perks | Get behind a blue pillar as soon as the electricity ball appears. |
A note on sources
Treyarch and Activision never published a walkthrough for any of these quests, so every step above is community-derived and was cross-checked against multiple independent guides before publication. A few figures are approximations rather than datamined values — the rocket test interval (roughly five to seven minutes) and the anti-gravity interval (roughly two to four minutes) in particular. If you find a step that behaves differently on your platform, tell us.
Source: Call of Duty Wiki — Primary reference, cross-checked.
Related Maps
Answers
Frequently asked questions
Can My Brother’s Keeper be done solo?
Yes, and it is the usual recommendation for a first main quest. Solo in a public match you need only one upgraded bow, and all four Keeper circles accept it.
Why do I need all four bows in a private match?
Private and custom matches require all four upgraded bows regardless of how many players are in the game. Only public matches scale the requirement to the player count.
What is the earliest round I can start?
Round 12 at the very earliest, because the first Ragnarok DG-4 part drops from the first Panzersoldat and that is when it arrives.
Answers
Frequently asked questions
Can the Der Eisendrache Easter egg be done solo?
Yes, and it is the usual recommendation for a first main quest. Solo in a public match you only need one upgraded bow, and all four Keeper circles will accept it.
How many upgraded bows do I need?
One per player in a public match. In a private or custom match all four bows are required regardless of how many players are in the game.
Which bow should I upgrade?
Storm (Kreema’ahm la Ahmahm) is the least fiddly to earn and suspends Panzersoldats, which is genuinely useful in the boss fight. Rune Prison is the hardest of the four and offers no quest advantage.
Why did my wisp step fail?
Almost always one of three things: you fired an upgraded bow at an object that was not sparking, you were still holding the non-upgraded bow, or you took too long. The step restarts at the beginning of the next round.
How long does the whole quest take?
Around 90 minutes if the steps go cleanly, including the setup rounds needed to build the Ragnarok and upgrade a bow. The first Panzersoldat does not arrive until round 12, which sets a floor on how fast you can start.
References
- 1.Call of Duty Wiki — Fandom. callofduty.fandom.com · accessed Jul 15, 2026Community-verifiedcorroborate
- 2.In-game verification — CODZombie editorial. codzombie.com · accessed Jul 15, 2026In-game verified
Last reviewed Jul 15, 2026. Spotted an error? Suggest a correction.