
Story
Origins is part of the Aether Story continuity, featuring the Primis crew.
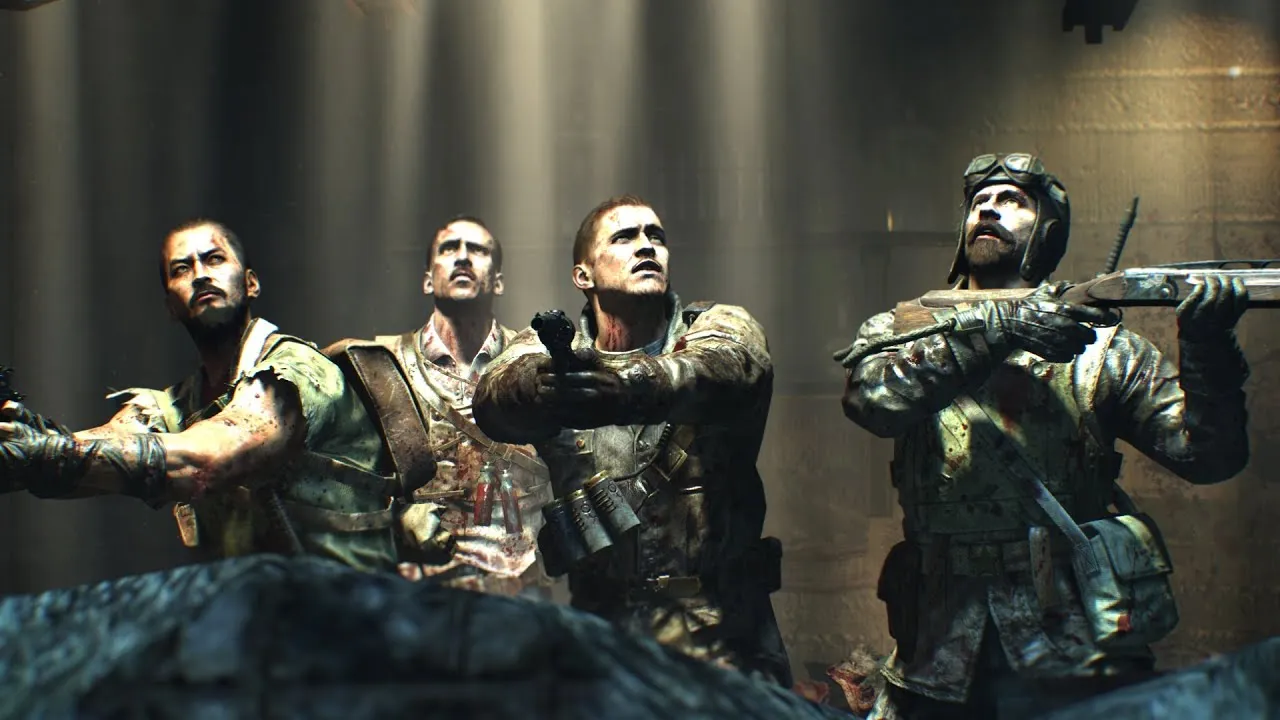
Call of Duty: Black Ops II · Apocalypse · Aether era
WWI France, giant robots, the Elemental Staffs, and the birth of Primis.
A diagram of how the areas connect. It shows routes and neighbours, not distances or shapes — it is not to scale.
Open route diagramOrigins has no power switch and six generators to capture, so the early game is a route problem rather than a points problem. This order gets Jugger-Nog in hand before the round 8 Panzersoldat and keeps the staff parts on schedule.
0 of 15 done
Two lean against the spawn-room walls and two more spawn randomly. You need one to dig, and digging is how the Ice Staff parts come out.
Costs 200 per player and refunds if you are standing on the platform when it completes. The Templars during the capture are free points, and the Rituals chest here pays out as soon as you take it.
Self-revive, and you can buy it three times solo.
Always in the same place, and easy to walk past on the way out.
Dig every spot you pass, and dig hard while it is snowing — snow is usually rounds 2 to 4 and the Ice Staff parts only appear in it.
Face screen on the Fire tunnel side of spawn, handles around the Generator 2 trenches or the Tank Station roof, frame in the marsh near Generator 4. Free at any bench.
Gramophone on the middle level of the Excavation Site, plain record somewhere outside it. Together they open the lower staff chamber — which is also the only way to reach Mule Kick.
The Panzersoldat only arrives if this door is open. You want it on schedule because its first kill is the only source of the third Fire Staff part. Leave it shut if you would rather delay the fight.
Aim to have this by round 7.
The MP40, or the STG-44 in the church. Do not meet round 8 with a starting pistol.
The Rituals chest here gives you the first Fire Staff rod part.
Three ledges only reachable by jumping off it. Two are on the return leg, which is why this is much easier with a second player driving. Use the same trip for the clean G-Strike tablet carry.
It opens at the top of the Excavation Site and closes again if a raid takes a generator down.
Main Quest
Eight steps, soloable, and two of them silently refuse to start if all six generators are not simultaneously live. Build and upgrade every staff, break the seal, and decide whether you want the ending or the rounds.
Origins is set at Excavation Site 64 in the Meuse-Argonne, France, in June 1918 — a WWI battlefield with three thousand-foot mechanical giants walking through it. It introduced the Primis crew and rewrote the mythology around them. It is also the most involved map Treyarch had built to that point, and almost every one of its systems works differently to the map you played before it.
There is no power switch. There is no single wonder weapon. The main quest has eight steps, two of which will silently refuse to start if you missed something twenty minutes earlier. This page covers the parts that actually cost people runs.
Power is captured, not switched. Six 115 Generators sit around the map, and each one only powers its own area — the perk machine beside it, the Mystery Box if the box is in that zone, and Der Wunderfizz if the orb has moved there. Pack-a-Punch needs all six on at the same time.
Generator 1 is in the spawn room on the upper level. Generator 2 sits beside the Tank Station and Generator 3 beside Speed Cola, on the two routes toward the Workshop. Generators 4 and 5 flank No Man’s Land — 4 on the left as you come from the Workshop, next to the Wind tunnel and Jugger-Nog; 5 on the right, next to the Lightning tunnel and Stamin-Up. Generator 6 is behind the church, the furthest point from spawn.
Capturing costs 200 points per player — 200 solo, 800 in a four-player game — paid by whoever activates the panel. A circular bar fills while players stand on the metal platform and drains backwards when nobody is on it; let it hit zero and the capture aborts and you lose the points. On a successful capture everyone on the platform gets 100 points and the player who paid is refunded, but only if they are standing on the platform and not bled out at that moment.
From round 10 onward, and only once at least four generators are powered, Templars will periodically raid one. The target is marked on your HUD and recurs every three to five rounds. Raiders ignore players entirely while draining or while walking between generators, so they are easy to miss until the announcement.
Losing one takes that zone’s power down and disables Pack-a-Punch across the whole map until you retake it. It also ends the All Your Base achievement run, and it blocks Easter egg steps 1, 2 and 8, all of which check that all six are live.
The machine is at the top of the Excavation Site mound, above the gramophone table. There is no build, no ritual and no part hunt — it opens the moment all six generators are simultaneously active, and it goes dead the instant one is raided down.
Upgrading costs 5000. Re-Packing costs 2000 in Black Ops II for a random attachment, which replaces the previous one and does not refill your ammo; the prompt displays 5000 rather than 2000, which is a UI bug rather than the real price. In the Black Ops III remaster, re-Packing instead rolls an Alternate Ammo Type for around 2500.
Four staffs — Fire, Ice, Lightning and Wind. Each needs three Amplification Rod parts plus an elemental gem, and each of those two halves works completely differently.
| Staff | Upgraded | Rod parts | Hard gate |
|---|---|---|---|
| Fire | Kagutsuchi’s Blood | Rituals chest at Generator 6; shoot down the orange-glowing plane; first Panzersoldat kill | Round 8 — the Panzer is the only source of the third part |
| Ice | Ull’s Arrow | Three dig spots, dug only while it is snowing | Snow. Usually rounds 2–4, then round 10, then random |
| Lightning | Kimat’s Bite | Three ledges reachable only by jumping off the Mark IV Tank | Two are on the return leg — very hard to get both solo in one run |
| Wind | Boreas’ Fury | One inside each of the three Giant Robots’ heads | You must enter all three robots; one part per robot |
The gem is separate. Pick up the gramophone from the middle level of the Excavation Site, find the plain record outside it, and put both on the Excavation Site table — that opens the stairwell down to the chamber holding all four staff pedestals. Each staff also has a coloured record; carry the gramophone and a coloured record to the end of that element’s tunnel, place them, and a gateway opens for about fifteen seconds. Run through for the Crazy Place, take the gem for the tunnel you came in by, and build at the matching pedestal below the Excavation Site.
Four stages, in this order, per staff. The order is strict — the overworld puzzle does not become active until the Crazy Place riddle is done.
The soul soak is usually quoted at around twenty kills, and twenty-five for Lightning, but every source hedges those numbers and they scale with player count — go by the audio cue and the red outline rather than counting. Once a staff is upgraded it stays upgraded: lose it and it reappears on its Excavation pedestal already upgraded.
Upgraded staffs all gain a charge shot on hold, a melee swipe that one-shots to about round 16, and Sekhmet’s Vigor — an alt-fire that flips the staff around to launch a revive orb in a straight line. For high rounds the upgraded Ice Staff is the one people keep; Lightning falls off around round 25 for normal shots.
Two, and either can be built at any workbench. Benches sit in the Wind tunnel on the Generator 4 side and on the church lower level where the tank sits. Guides disagree about where the third one is, so go by those two.
The Zombie Shield takes a face screen from the Fire tunnel side of spawn, handles from the Generator 2 trenches or the Tank Station roof, and a frame from the marsh near Generator 4. It blocks damage from the front while held and from behind while stowed, deflects your own explosives with no penalty, and bashes for a one-shot kill to about round 20 — though the bash pays 10 points a hit and nothing for the kill. In Origins it takes its own slot rather than the equipment slot, so you can carry it alongside the drone.
The Maxis Drone takes a brain from the spawn-room table — that one is always in the same place — plus a frame and a rotor with three possible spawns each. Thrown out, it flies with you for about ninety seconds, engages zombies with an MG08/15, picks up power-ups and revives downed players, then returns to the bench it was built at to recharge. Only one player carries it at a time.
Eight steps, fully soloable, and in Black Ops II it cannot be completed on Easy difficulty. Two things are worth collecting long before you need them: the One Inch Punch, which every player needs for step 6, and a G-Strike beacon, which at least one player needs for step 3. Both get considerably harder to obtain later.
The other trap is in step 6: do not punch Crusader zombies while they are still coming through a wall. The tablet they drop can land somewhere unreachable, and that makes the Easter egg uncompletable for the rest of the game.
Step 7 is what unlocks the achievement. Step 8 exists, gives you a unique ending and a post-scoreboard cutscene, and ends the game — so finish step 7, then decide whether you want to keep playing.
| Perk | Cost | Where | Needs |
|---|---|---|---|
| Quick Revive | 500 solo / 1500 co-op | Spawn room, up the stairs | Generator 1 |
| Speed Cola | 3000 | Near Gen 3, inside Thor’s footprint | Generator 3 |
| Jugger-Nog | 2500 | Directly beside Generator 4 | Generator 4 |
| Stamin-Up | 2000 | Beside Generator 5, in the corner | Generator 5 |
| Mule Kick | 4000 | Excavation Site, across from the staff pedestals | Gramophone and plain record for access |
| Der Wunderfizz | 1500 per use | One active orb; moves between all six generators | That generator |
There is no Double Tap machine anywhere on Origins. It comes only from Der Wunderfizz or from the Rituals of the Ancients reward for spending 30,000 points — and the Rituals version can be taken as a fifth perk, which is one of only two ways to break the four-perk cap. PhD Flopper is Wunderfizz-only and Black Ops II-only; the remaster replaces it with Widow’s Wine. Deadshot and Electric Cherry are also Wunderfizz-only.
Der Wunderfizz behaves like the Mystery Box — it cycles, and eventually gives you a teddy bear bottle and relocates to another generator. A periodic lightning strike marks wherever it currently is.
The other way past four perks is the Empty Perk Bottle, which needs the Golden Shovel — earned by digging a lot of spots in one game — plus active Zombie Blood, then digging an orange-glowing spot that is only visible during it. Spot locations are randomised per game but persist until dug.
The Panzersoldat first arrives on round 8, but only if the No Man’s Land door is open. Leave it shut and it does not come at all; open it after round 8 and it arrives the following round. It returns every third round in co-op and every fourth or fifth solo, and its health scales with player count.
It downs an unprotected player in one melee hit, two with Jugger-Nog, and its grappling claw pulls one player in before torching them at close range. Break the grab by shooting the small red light on the arm that fired, meleeing that light, or landing enough head damage. It stands completely still while using the claw or the flamethrower, which is your window. Monkey Bombs and G-Strikes do not distract it. Boarding the tank makes it fly off until you dismount.
The three robots are Freya on the church lane, Odin down the middle over the Excavation Site, and Thor on the right over Generators 2 and 3. Odin is the dangerous one — it steps in about seven places around Pack-a-Punch and lands on three of the four soul chests. Lights around a footprint flash red before a stomp, and a stomp downs you instantly unless you shot open a lit foot’s hatch first, in which case you are teleported up into the head.
Inside a head you have about thirty seconds before the robot purges you, extended if you play the audio log. Each holds one Wind Staff part, and Freya also holds a radio.
Generator 5 and Stamin-Up is the usual answer: a big open semi-circle with room for a full train, the perk on site and the Lightning tunnel as an escape. The catch is that Thor and Odin both step nearby and Generator 5 is a frequent raid target, so you will get moved off it.
The Excavation Site interior is tighter but loops almost perfectly, and everything you need — Pack-a-Punch, the staff pedestals, Mule Kick — is inside it. Crawlers clog the ramps at high rounds and Odin’s footprints ring the outside.
Generator 4 and Jugger-Nog is worth considering purely because you can re-buy Jugger-Nog immediately after going down, which is better survival odds after a mistake than anywhere else on the map. Avoid No Man’s Land and the narrow trenches entirely — the mud slows you and the zombies do not care.
Generators cost 200 per player, so a solo capture is 200 and a four-player one is 800 — but captures fill faster with more bodies on the platform. Quick Revive is 500 solo with a self-revive and buyable three times; 1500 in co-op, where it only speeds up reviving someone else. The Rituals chest at Generator 1 gives Zombie Blood in co-op and Double Points solo.
The quest itself is harder solo in exactly one place. Step 3 needs someone to press a button inside a robot head and someone to throw a beacon at a seal across the map; in co-op that is two people doing one thing each. Solo you press the button, let the robot purge you because it is faster than climbing out, sprint to the seal priming the beacon on the way, and throw — all inside one cycle. Expect several attempts, not least because which foot lights up is random.
Everything else scales the other way: soul chests need more kills per player, step 4 spawns more Panzersoldats, and step 6 requires every player to earn their own Iron Fist, so a full squad is strictly more work there.
Origins is part of the Aether Story continuity, featuring the Primis crew.
Answers
Yes — Origins supports completing its main quest solo.
Origins is a Zombies map from Call of Duty: Black Ops II, released Aug 27, 2013.
Last reviewed Jul 15, 2026. Spotted an error? Suggest a correction.
Cookies & consent
Analytics and ads keep this site free — nothing loads until you choose. Privacy policy